
Your first scare in 15 minutes
By the end of this page, waving your hand in front of a motion sensor will make a light flash on a different board. That is the whole idea of PropMesh, on your desk.
What you need
Section titled “What you need”- Two ESP32 DevKit V1 boards (why this board). Other boards work too, but the pin names below are the DevKit’s.
- Two USB cables that carry data, and a USB phone charger for the second board.
- A PIR motion sensor. The common HC-SR501 (a white dome with three pins) is perfect.
- Three female-to-female jumper wires.
- A computer with Chrome or Edge.
The “glowing eyes” will be the small blue LED that is already on the board, so there is nothing else to wire.
-
Install the firmware on both boards
Section titled “Install the firmware on both boards”Follow Install the firmware once for each board. It takes about a minute each.
-
Wire the motion sensor to one board
Section titled “Wire the motion sensor to one board”Unplug that board first. With the sensor’s dome facing you and its pins at the bottom:
Sensor pin Board pin VCC (or +) VIN OUT D34 GND (or −) GND Plug this board into the charger. This is your prop board.
-
Connect the console
Section titled “Connect the console”Plug the other board into your computer and open the console:
mrwillson2u.github.io/propmesh/console
In Nodes & Channels, press ⌁ Connect USB node and pick the board from the list. The board appears as a chip at the top of the page.
-
Make it the bridge
Section titled “Make it the bridge”Click the board’s chip. Type Bridge in Name this node, switch on the Bridge toggle, and press Save to node.
Within a few seconds the prop board appears beside it, first as connecting… and then as a chip of its own. The two boards are now talking by radio.
-
Tell the prop board what’s connected
Section titled “Tell the prop board what’s connected”Click the prop board’s chip and name it Skeleton. In its pin table, set:
Pin Function Name Options D2 LED dimmer (PWM) eyes — D34 Sensor / button input gate pull: none 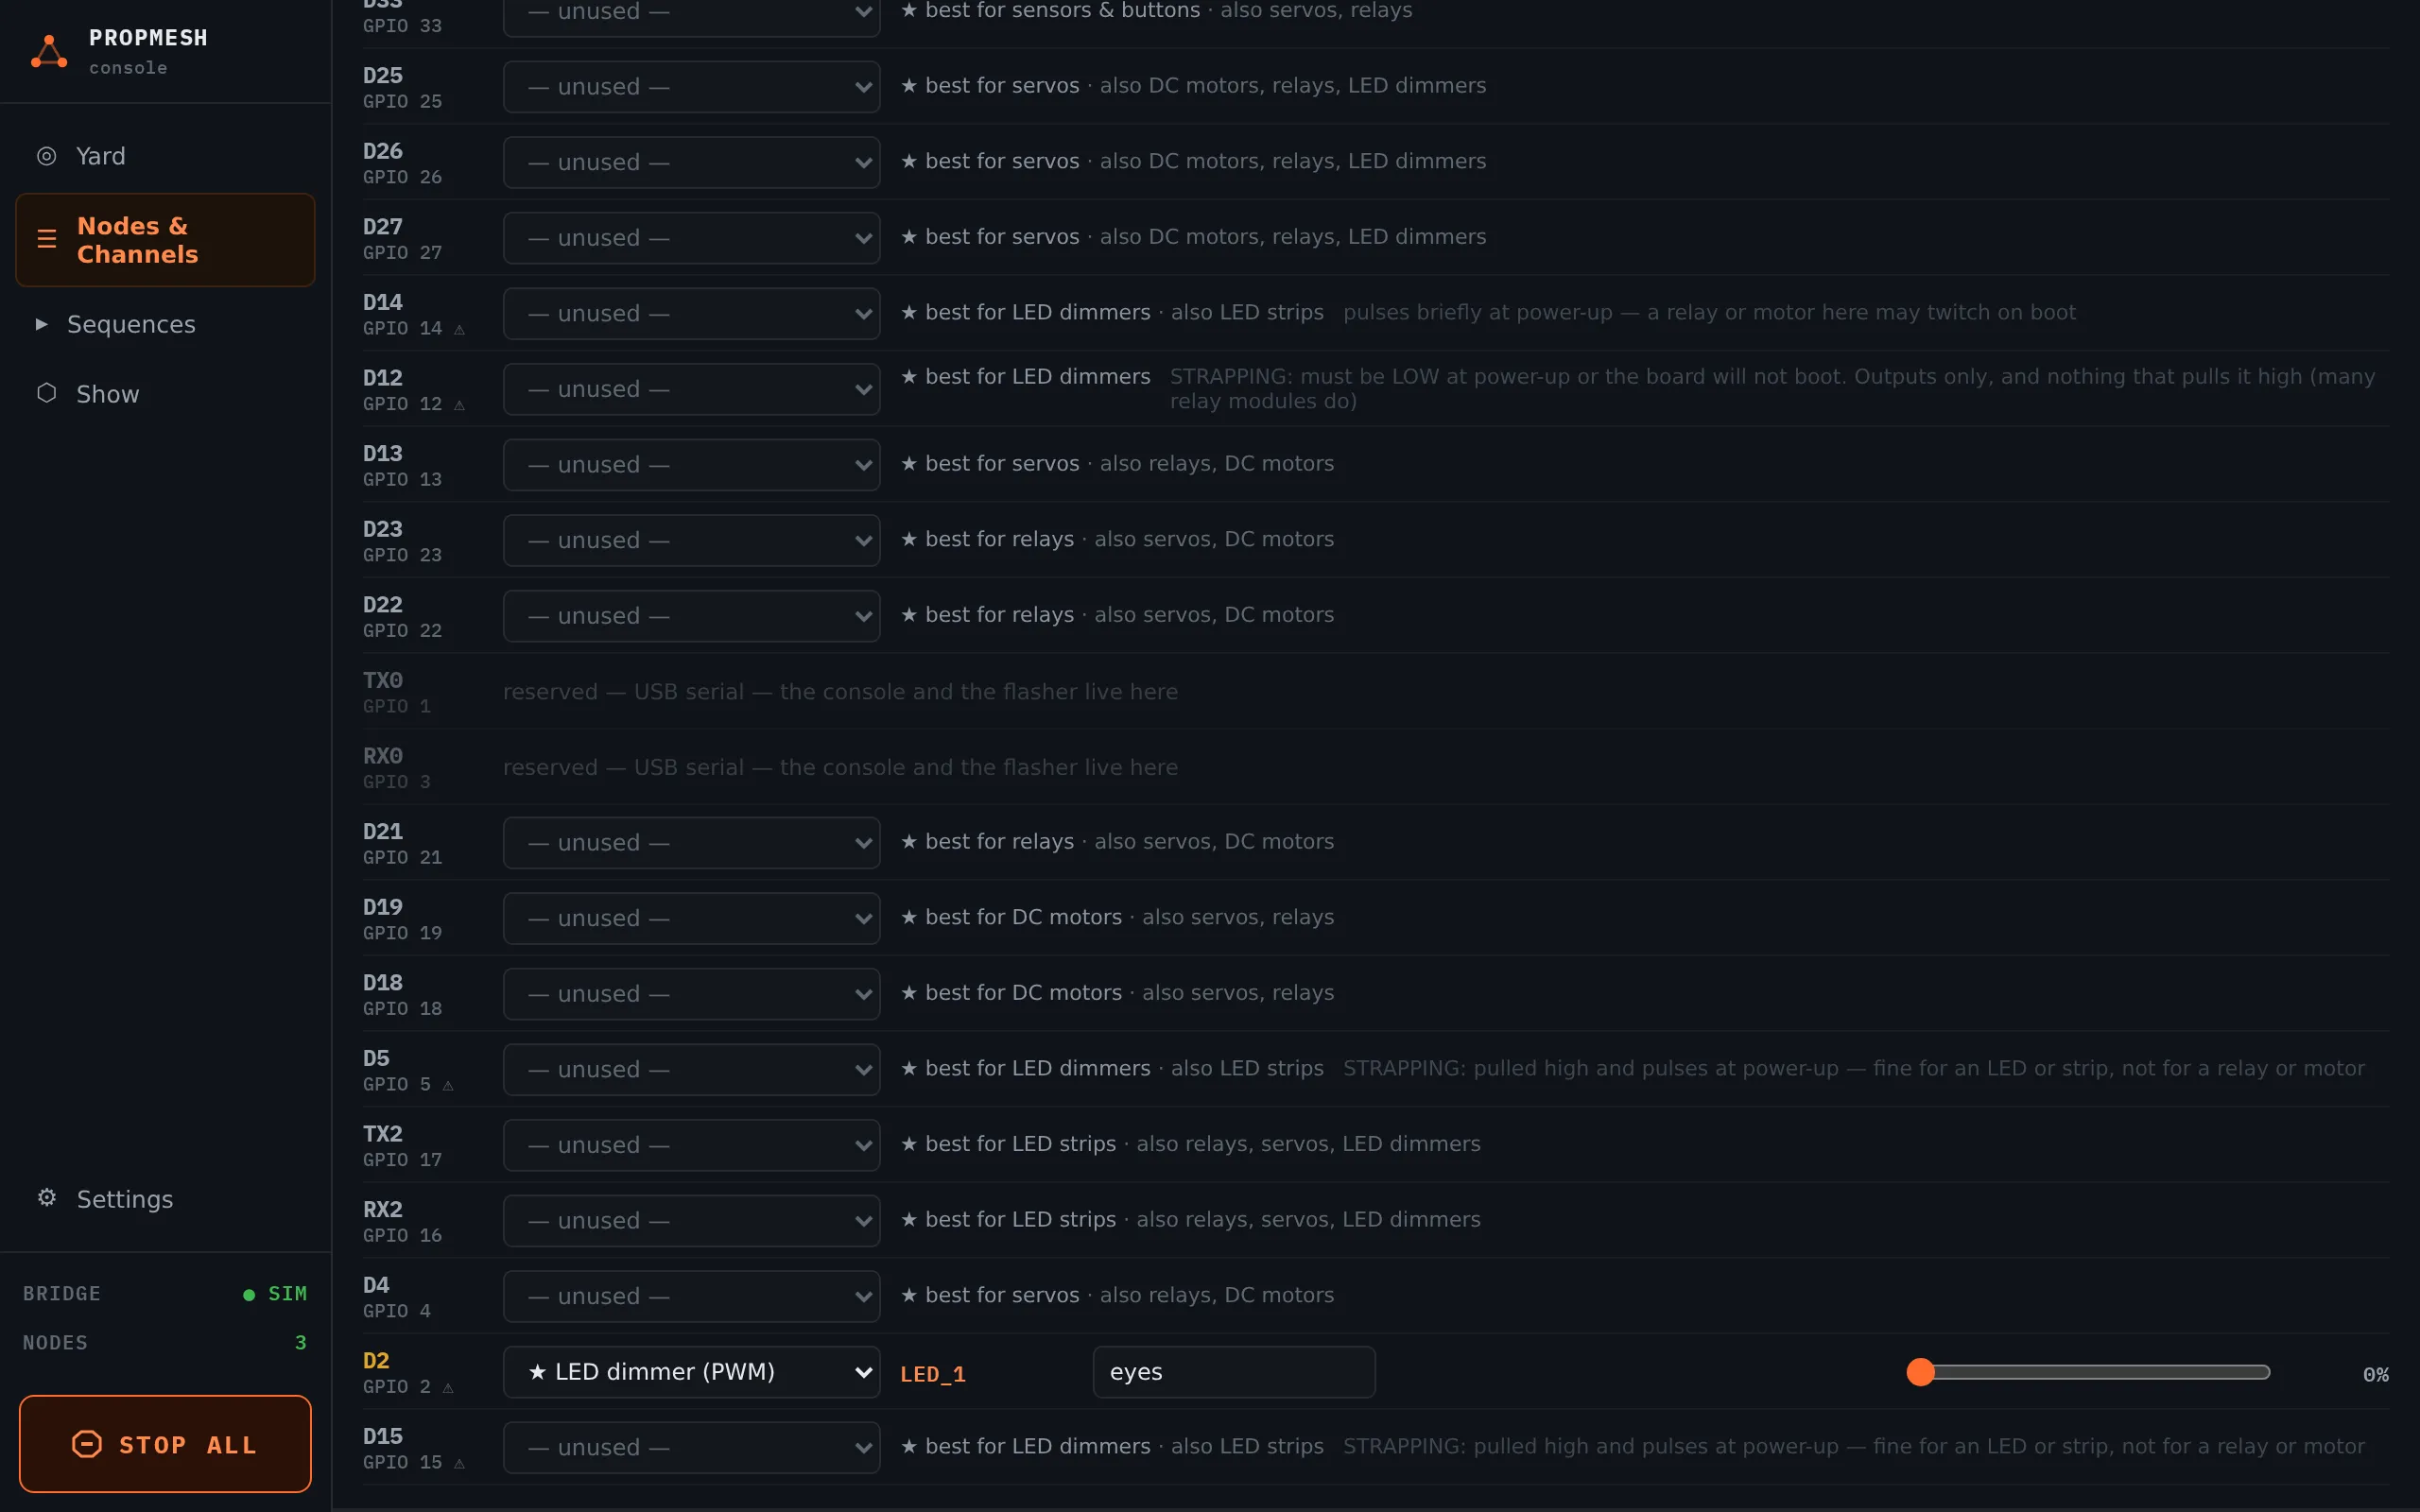
Press Save to node. Now try it out:
- Drag the eyes slider in the TEST column. The blue LED on the prop board dims and brightens.
- Wave at the sensor. The gate row shows ● ACTIVE.
-
Make a sequence
Section titled “Make a sequence”Go to Sequences and press + New sequence. Name it Eyes flash.
Press + Add first track… and choose Skeleton → eyes. Then use + Add step to build this:
AT (s) VALUE 0 100 % 0.3 0 % 0.6 100 % 1.5 0 % 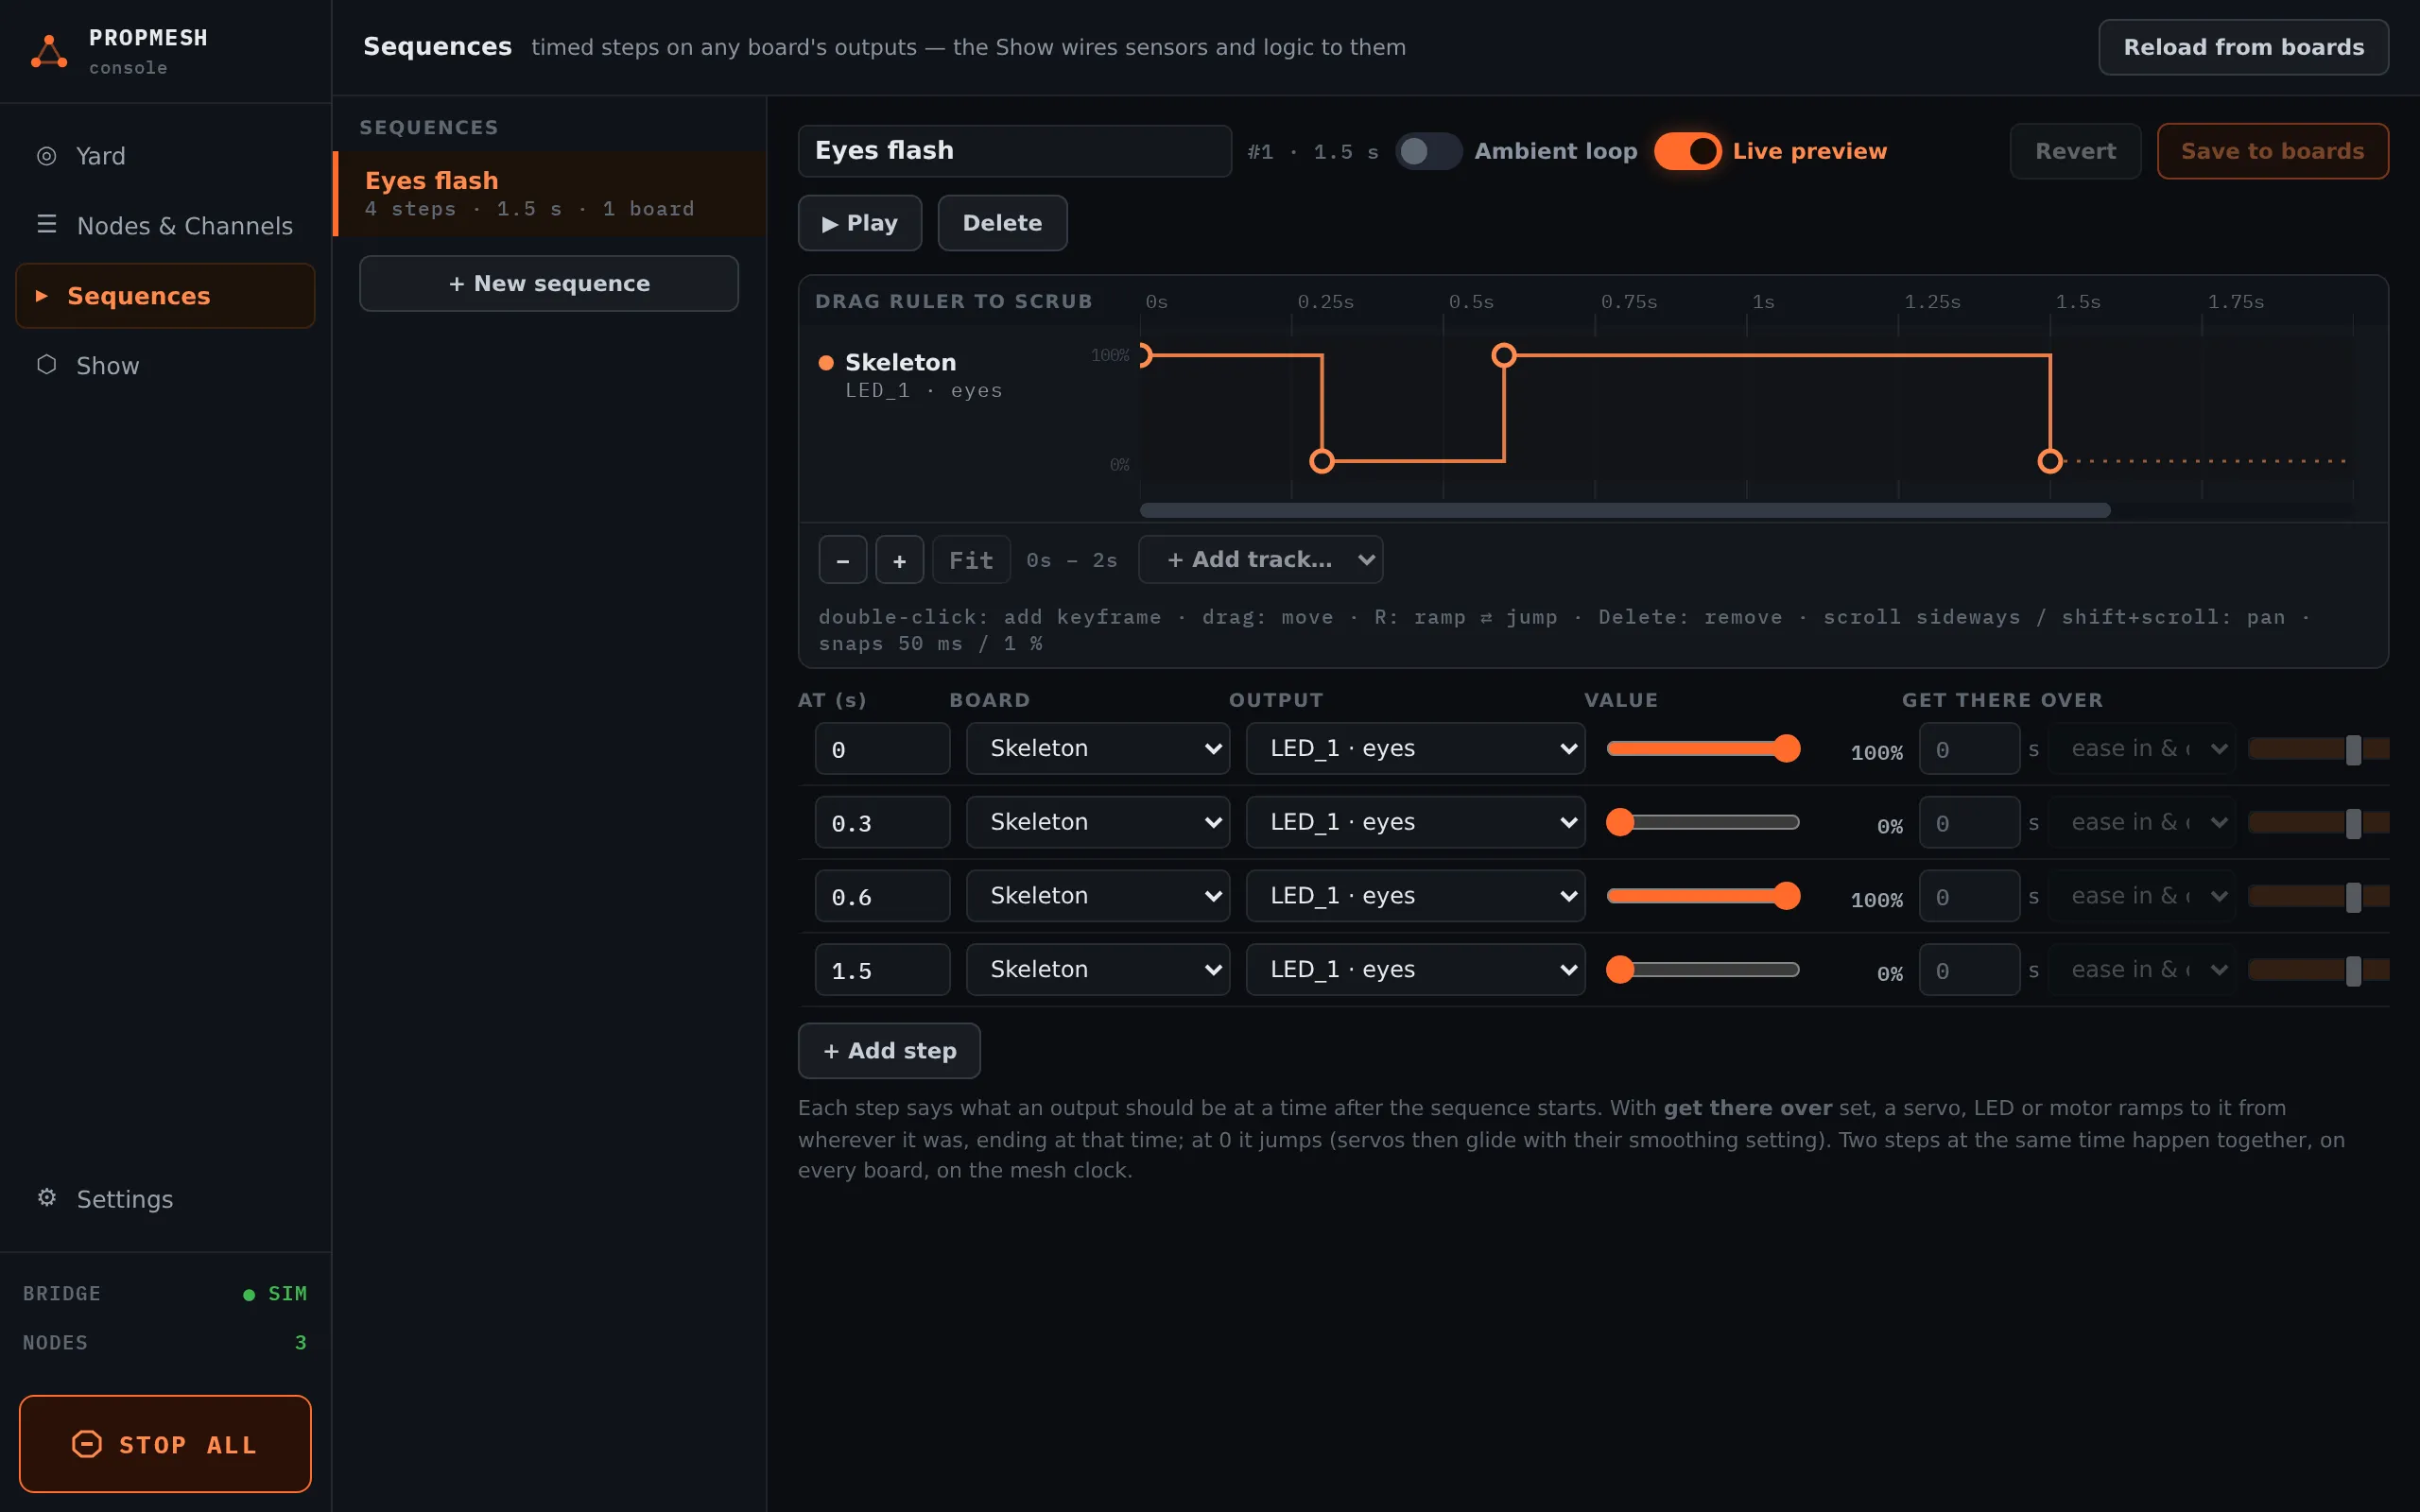
Press Save to boards.
-
Wire the trigger
Section titled “Wire the trigger”Go to Show. Drag a ⊙ Sensor block onto the graph and set it to gate, becomes active. Drag a ⚡ Play sequence block next to it and set it to Eyes flash. Drag from the dot on the right side of the sensor block to the dot on the left side of the play block.
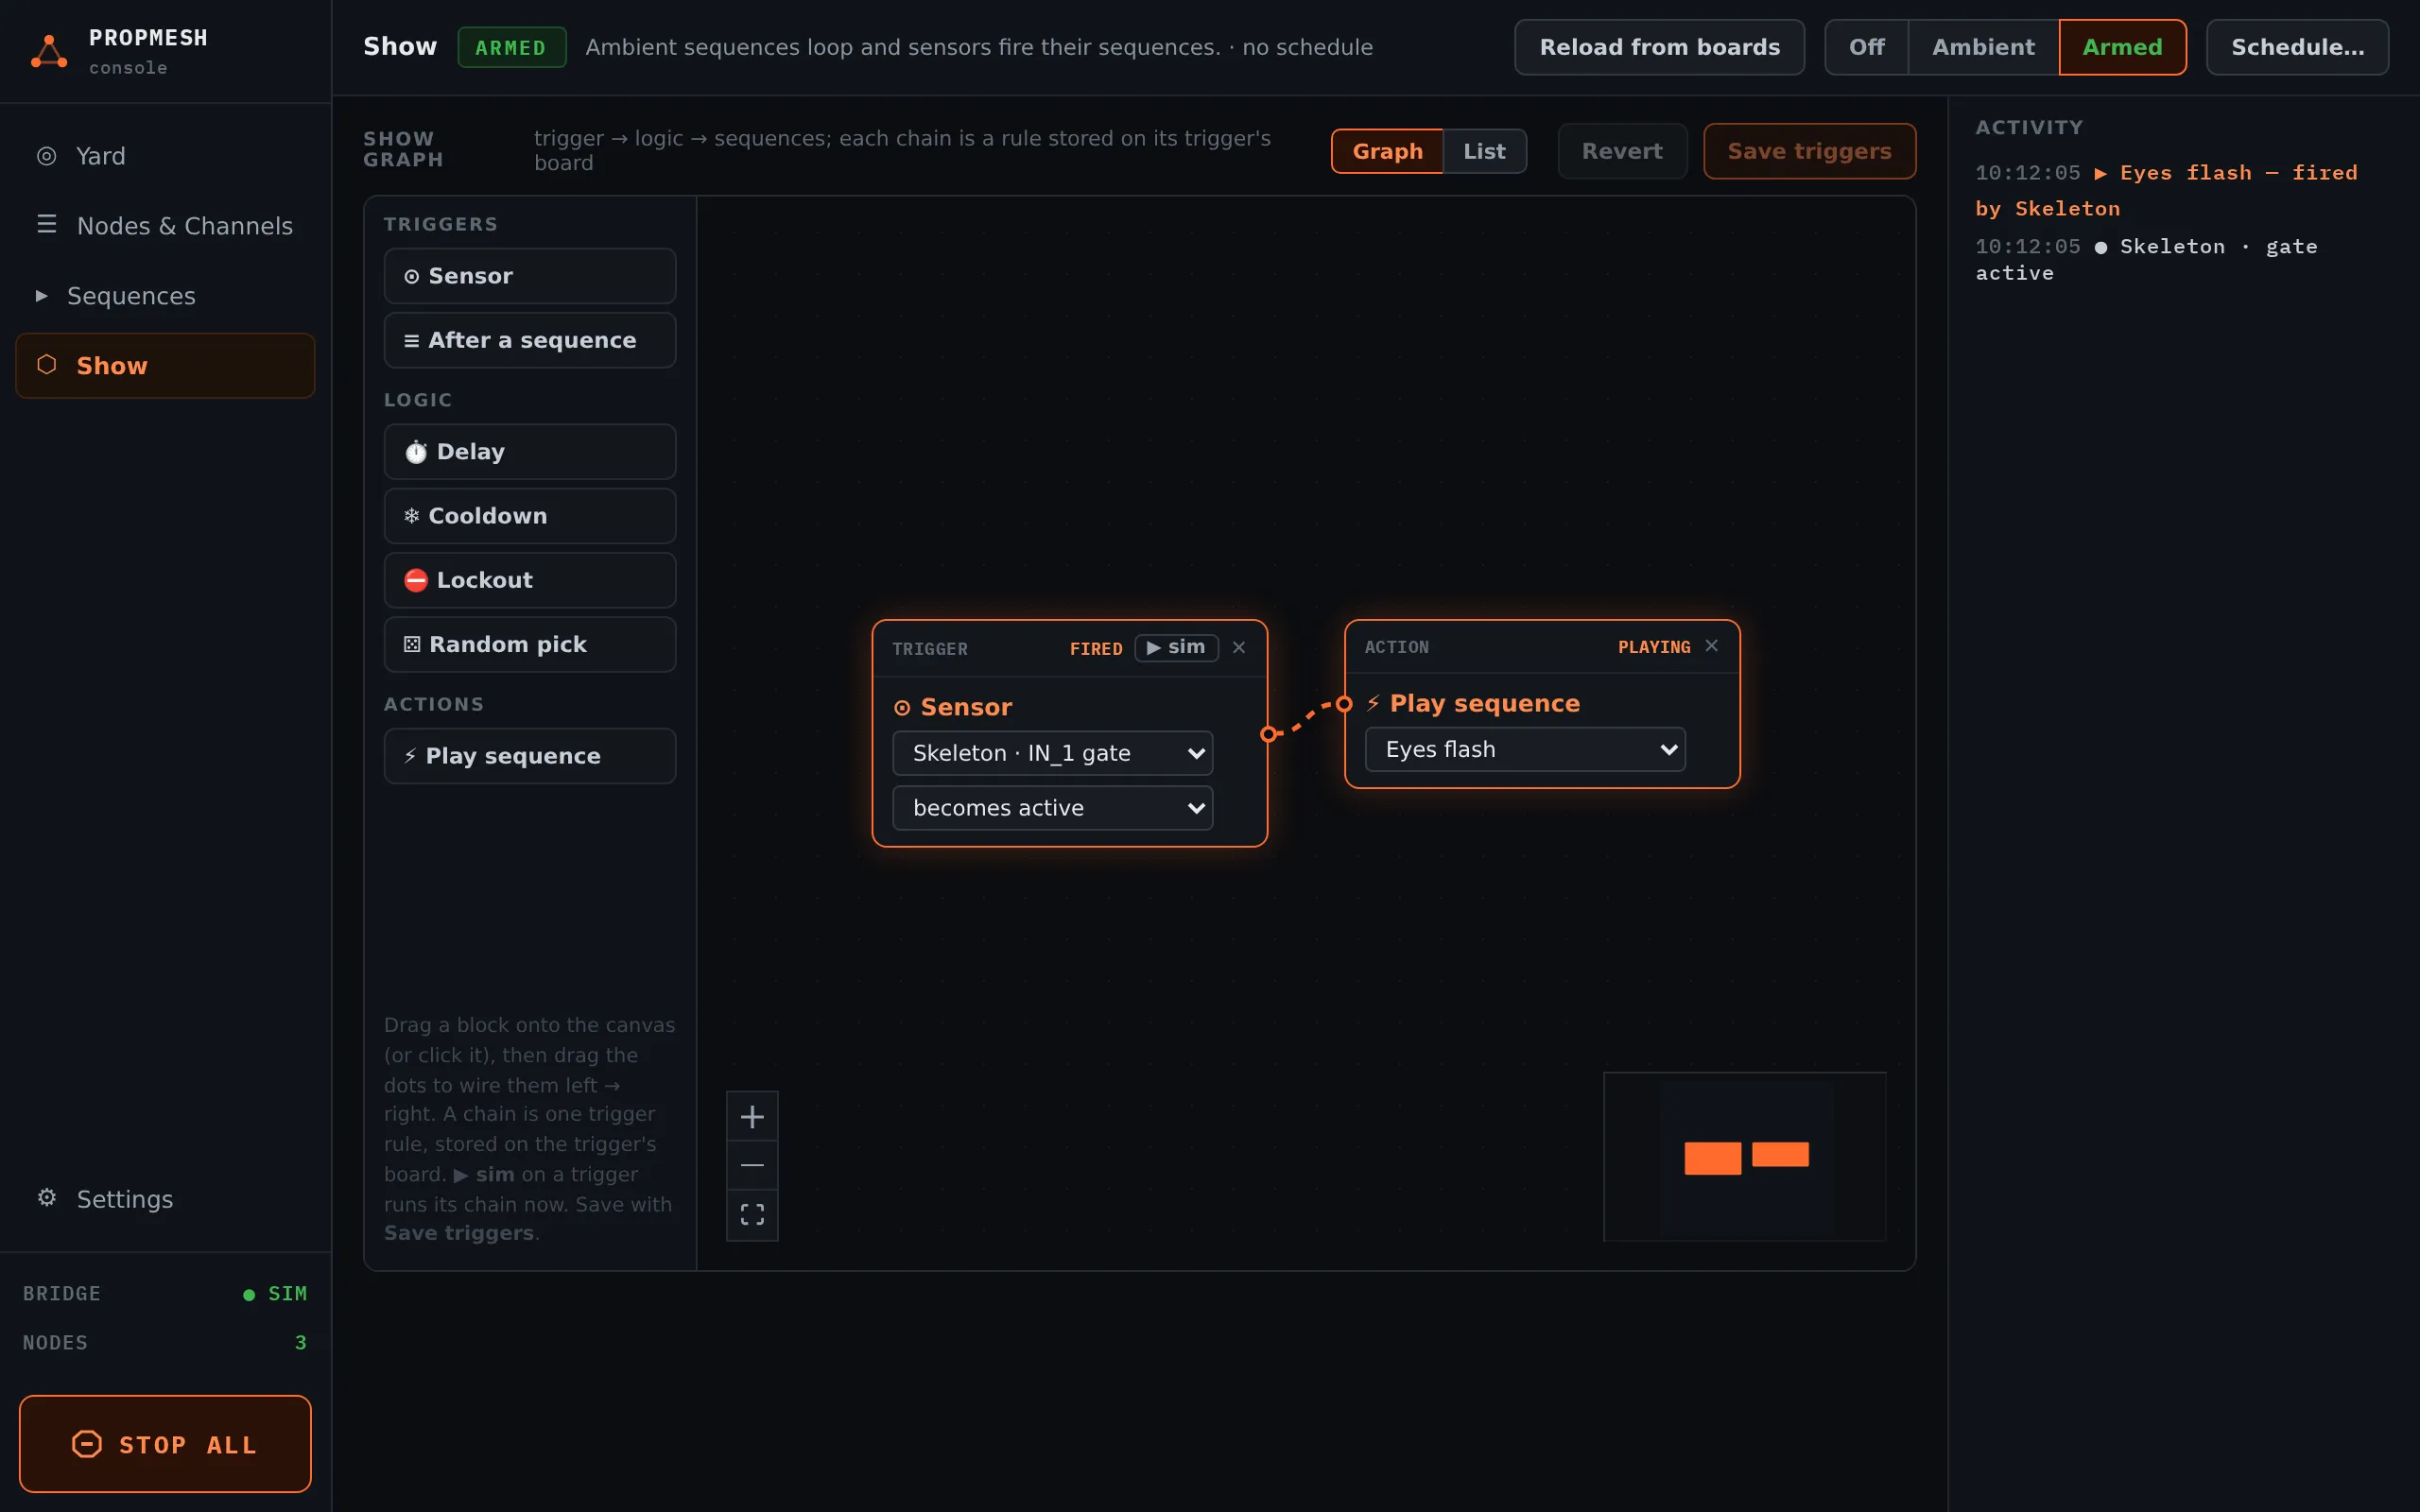
Press Save triggers.
-
Walk past the sensor
Section titled “Walk past the sensor”The mode at the top of Show should read Armed. A fresh board starts out armed, and stays that way until you set a schedule. If it says something else, press Armed.
Now walk past the sensor. The eyes flash.
What just happened
Section titled “What just happened”The sensor and the light were on the same board this time, but they didn’t have to be. The trigger lives on the board with the sensor, and it plays the sequence on every board at once. A sensor at the gate can just as easily flash the eyes in a tombstone across the yard. To see it, add a third board, give it an output, and add a track for it to Eyes flash.
You can close the console now. The show is stored on the boards and keeps running.
Next steps
Section titled “Next steps”- Wire real props: LED strips, servos, relays, flood lights.
- Sequences in depth and triggers.
- Draw your yard and see where every board is.